There exist many small commercial available GPS-modules suitable for use in the CanSat with Arduino programming. As an example, we here explain how the GPS-module Venus638FLPx_DS GPS Receiver relatively easily can be used with the Teensy 3.5 and CanSat kit.
For an easier use of the Venus638FLPx_DS , it can be ordered on a break-out board as Navspark Mini with antenna.
How to get the GPS module to work with the Teensy 3.5
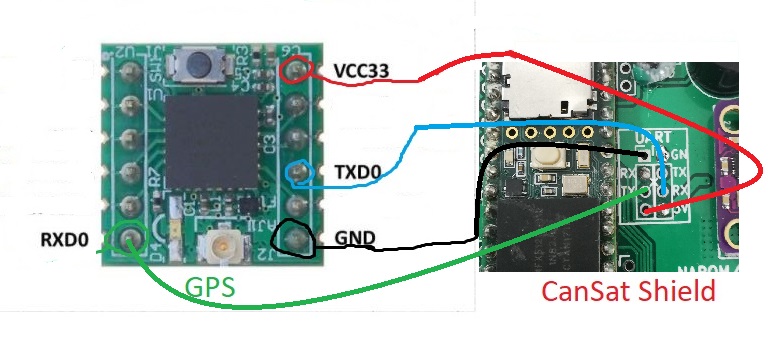
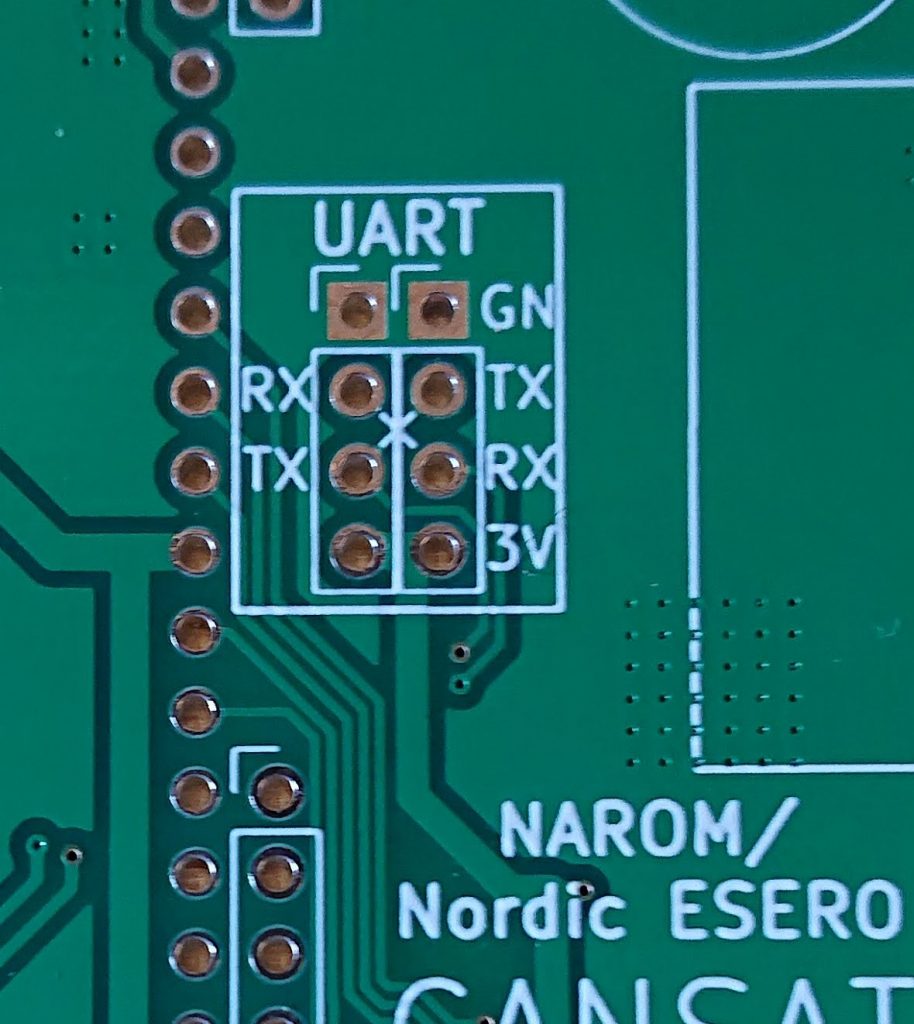
The needed connections between the Teensy and the GPS-module are ground, supply voltage (3.3V), Tx and Rx. As seen on the figure to the right some are included in the CanSat NAROM 2018 pcb design.
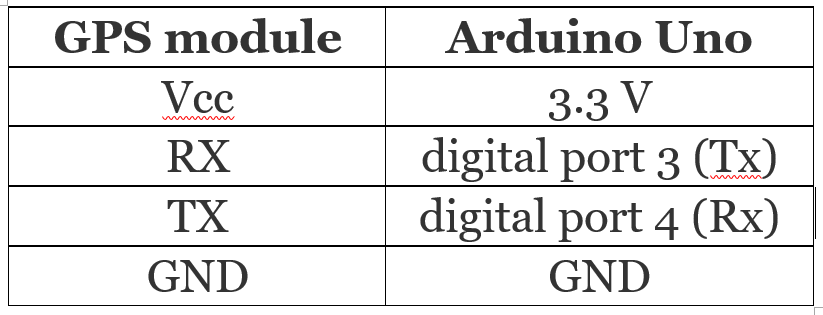
As seen in the Table to the left, the Tx on the module has to be connected to the Rx port on the Teensy and the Rx port om the GPS-module has to be connected to the Tx port on the Teensy. There are several TX and RX pairs available on the Teensy 3.5 and here the RX1 and TX1 pair is chosen for the GPS connection. Each of the TXn and RXn pairs on the Teensy has a spesific command/name in the Arduino programme and to use the RX1, TX1 pair we use «Serial1» when addressing the RX1 and TX1 communication ports. See the programme examples below for further information.
Follow the steps below to get the GPS-module functioning with coordinates, altitude and number of satellites as output in the serial monitor:
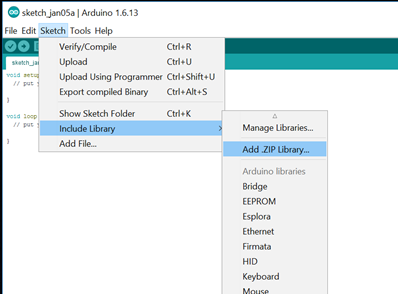
- Download and include the zipped “TinyGpsPlus”-folder into the Arduino library on your PC. See the figure to the right. Use the following link to download the needed library: TinyGPSPlus.
- Copy the text in this text-document: tiny_gps_1 into an empty Arduino sketch and compile it to be sure, that the library is included correctly.
- Connect your Teensy 3.5 by an USB cable to your PC and upload the sketch to the Teensy 3.5.
- Disconnect the Teensy 3.5 from your PC.
- Connect the GPS-module to the Teensy 3.5 as indicated in the figure above.
- Connect the Teensy 3.5 to your PC again. If the connections are correct, the GPS module should now show a lighting red diode. After some minutes the diode will start blinking which means that the GPS module has got signal from more than 3-4 GPS-satellites and is able to give out the GPS coordinates for it’s position.
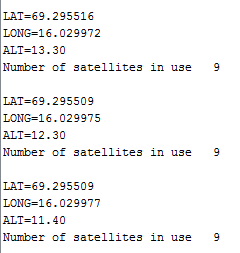
- Open the serial monitor and watch the data from the GPS module as the example shown in the figure to the right below. The GPS and Teensy need to run for some minutes before the GPS manage to connect to enough satellites required to give out a GPS-position.
If it works as intended: Look over the lines in the Arduino programme that you are using now.
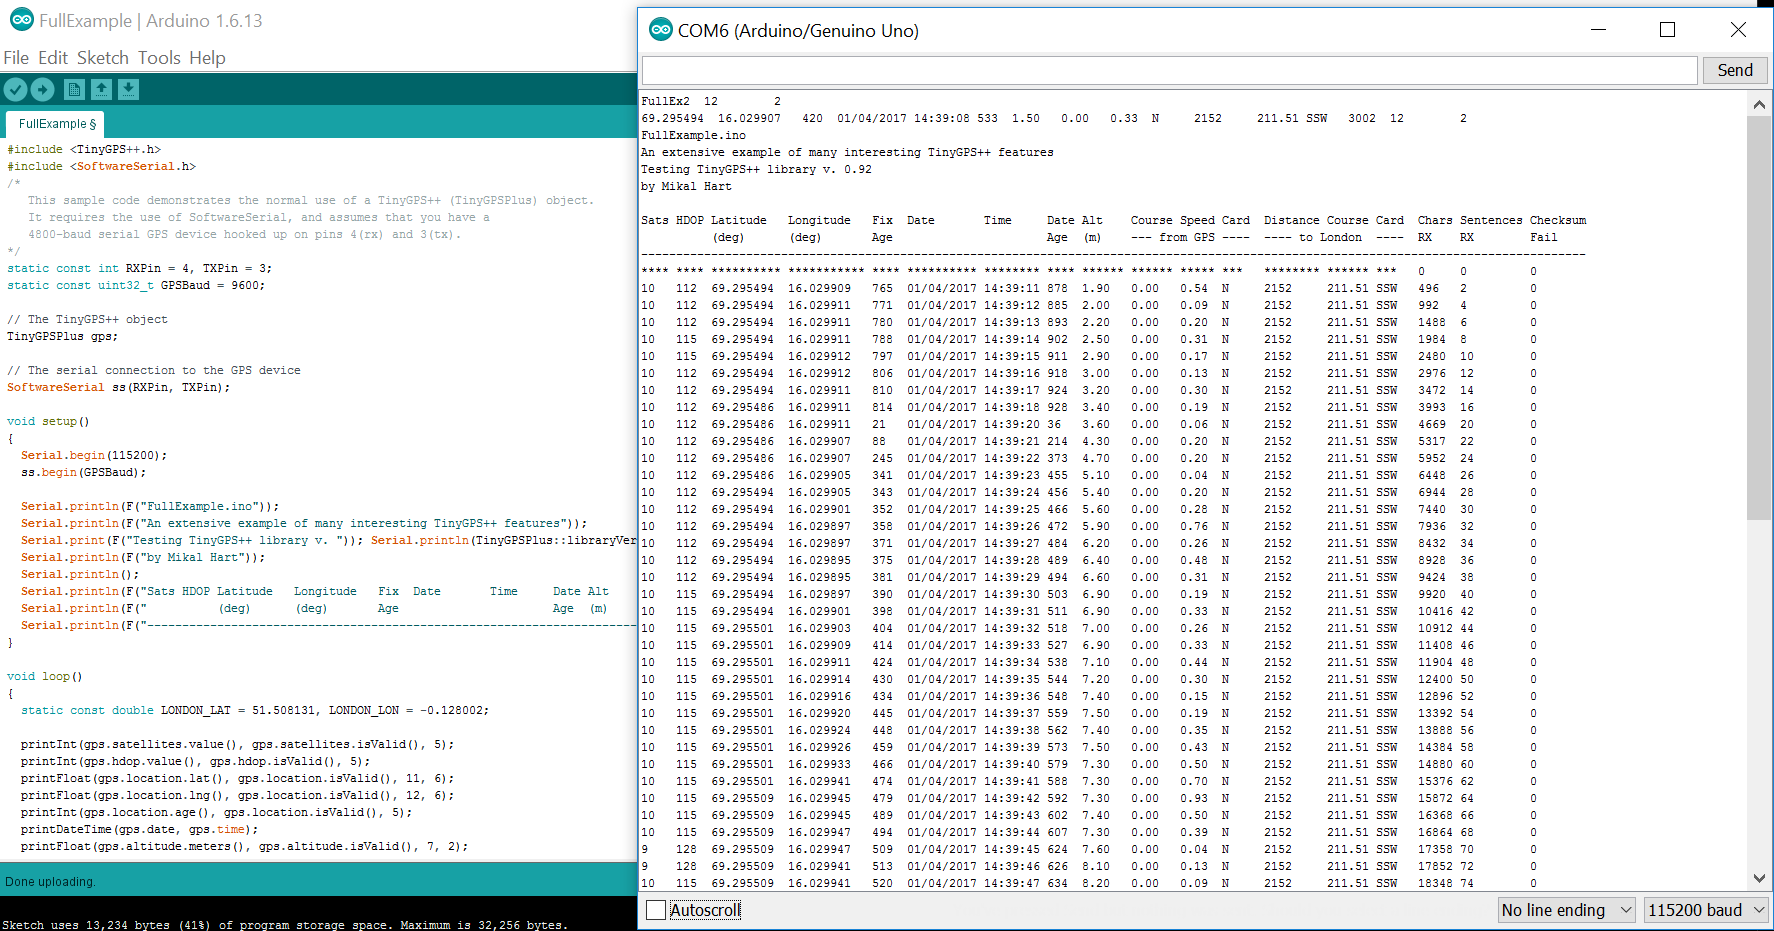
more complex version with check sum etc. can be found here: gps_full_version. An example of serial monitor output using this full version programme is seen in the figure to the left. Click for a larger version.
You can find more information of TinyGpsPlus and more Arduino programs from this link, which was used as inspiration and source for this section.
It is fortunately quite easy to show a GPS track in Google Earth. We have made an example file that you can find here and edit with you data. Google Earth uses an XML file format which have the file extension KML. You can put your GPS data in between the <coordinates> </coordinates> brackets/section, and in the attached example file, we have put Andøya Space Center as an example. There is one data point on each line, and the values are comma separated. The first field is longitude, the second latitude and the last is altitude in meters above sea level.
GPS Coordinates in Google Earth
is fortunately quite easy to show a GPS track in Google Earth. We have made an example file that you can find here and edit with you data. Google Earth uses an XML file format which have the file extension KML. You can put your GPS data in between the <coordinates> </coordinates> brackets/section, and in the attached example file, we have put Andøya Space Center as an example. There is one data point on each line, and the values are comma separated. The first field is longitude, the second latitude and the last is altitude in meters above sea level.