Launch the Arduino Application
Double-click the Arduino application in the folder where you extracted it.
Open example code
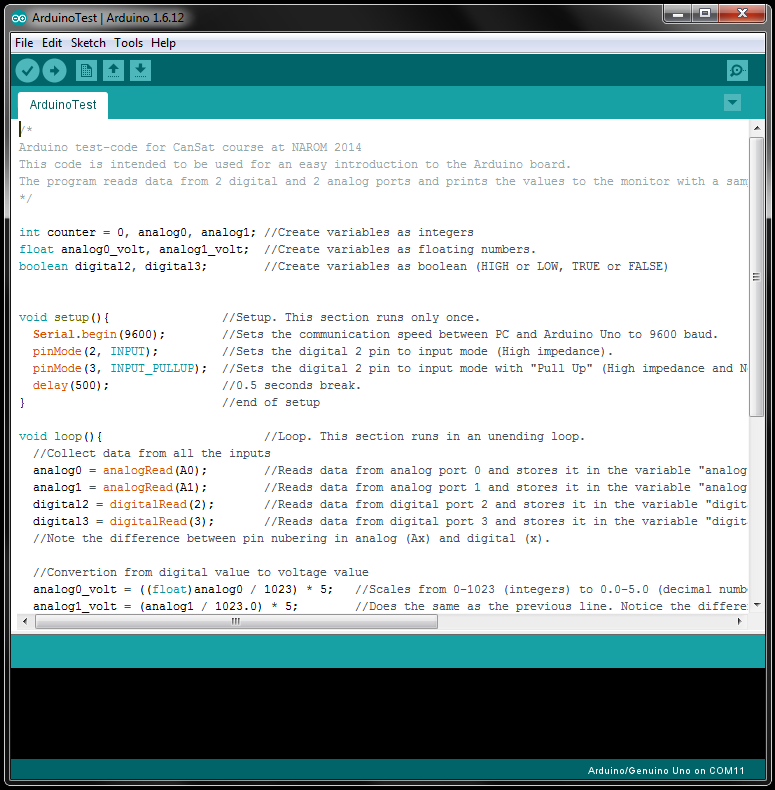
Andøya Space Education has a collection of example source code which will be used during the course.
To use the code for testing the Arduino Uno copy the text in the Arduinotest textfile (follow the link) and paste it into the Arduino sketch window you just opened. (See the figure to the right)
Select your Board
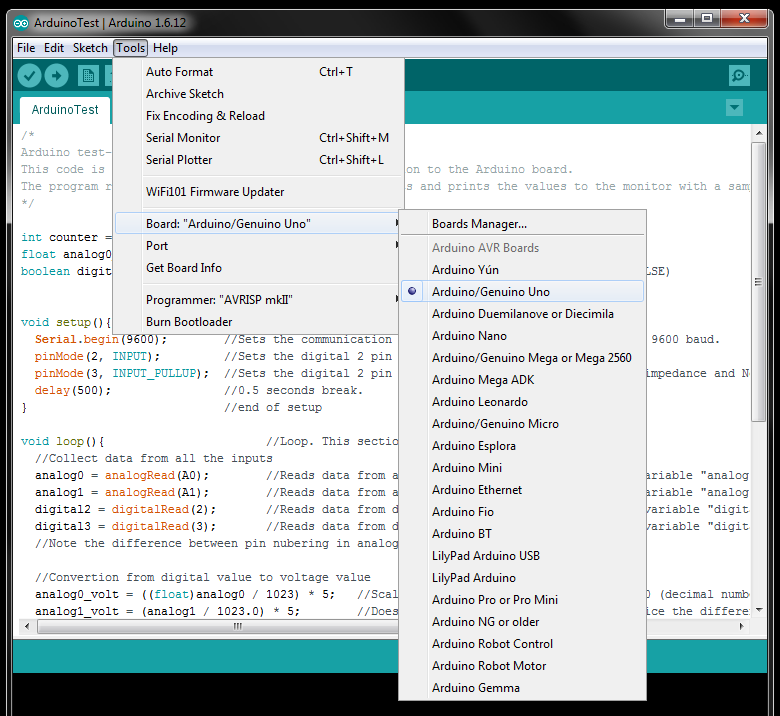
You’ll need to select the entry in the Tools → Board menu (See the Figure to the left) that corresponds to your Arduino. Otherwise you won’t be able to communicate with the Arduino Uno Board.
Select your serial port
Select the serial device of the Arduino board from the Tools → Serial Port menu.
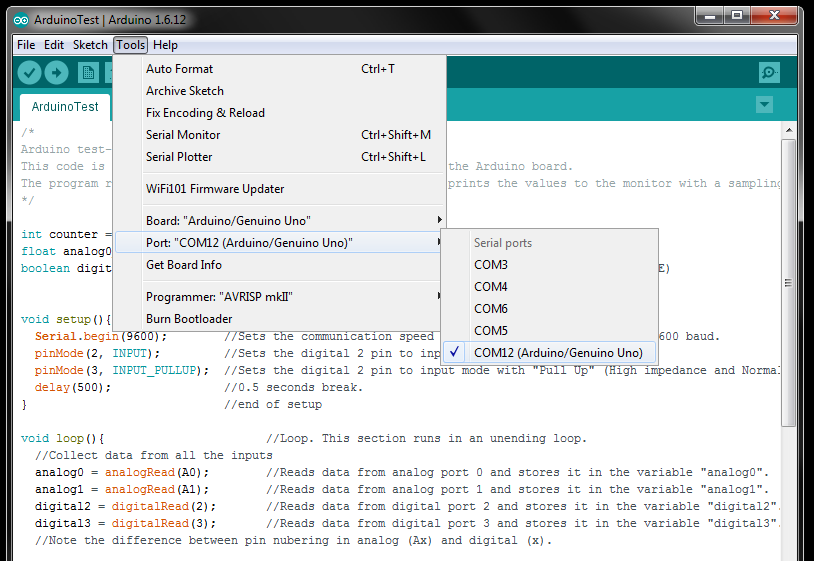
You will probably have several COM-ports available. The Arduino will most likely be the highest COM-port number. To make sure, you can disconnect your Arduino board and re-open the menu; the entry that disappears should be the Arduino board. Reconnect the board and select the correct serial port.
In the version 1.6.12 of Arduino IDE, the correct com-port will be labelled (Arduino/Genuino Uno) in the port list.
Uploading the program

Now, simply click the «Upload» button (Right arrow on the left, as marked in the figure to the left) in the compiler.
The first time you use a new sketch you will sometimes be asked to save the sketch in a folder with the same name as your sketch before it will run as expected.
Wait a few seconds – you should see the RX and TX LEDs on the Arduino board flashing. If the upload is successful, the message «Done uploading.» will appear in the status bar.
Read data

Open the Serial Monitor to look at the data which is received from the Arduino Uno board.
The Serial Monitor is opened by clicking the icon to the right in the toolbar (Figure to the right). The Serial Monitor will open a new window which will give you a serial text stream of the data printed from the Arduino Board.
Testing the Arduino Uno Board
To verify that you are receiving correct data you can test it by setting each channel to ground and power and read the output in the Serial Monitor. To do this you need a wire to connect between the input connectors and power connectors on the Arduino Uno board.
- Connect one end of the wire to A0 port
- Connect the other end to GND port
- Analog0 in the Serial Monitor should now read 0.0 volts
- Remove the wire from GND and connect it to 5V
- Analog0 should now read approximately 5.0 volts
- Remove the wire from 5V and connect it to 3.3V
- Analog0 should now read approximately 3.3 volts
- Repeat the same procedure with A1, D2 and D3
- Do you get the same value from the digital port in both 3.3V and 5V?